Tips and Tools for Sawing Sheet Metal
Build out your workbench step by step…
In this series of blogs for beginner jewellers, we’ve been helping you piece together the tools you need to be fully equipped to become a professional. From basic workbench essentials to filing tools and polishing techniques. We hope you find this latest instalment useful – it’s all about how to cut metal sheets for jewellery making and metal cutting tips for using a jeweller’s saw frame to get the best results.
Cutting sheet metal: The basics
Cutting sheet metal is an essential part of working with precious metal and is a skill that you will come across quite early on in your career as a jewellery maker. Although metal shears can cut through metal effectively, getting to grips with a jeweller’s saw means that you will have the skill of cutting out intricate shapes from your sheet metal.
As a beginner, it’s good to know that your saw blades will break – it happens to the most experienced of jewellers. Mastering the technique can help you to prevent this from happening as frequently but remember to not let this ruin your concentration when cutting sheet metal. Even the most expensive of saw blades will break if too much tension or pressure is put on them.
Practice really does make perfect when it comes cutting sheet metal with a saw. Try to keep the piece you’re cutting stable in a vice. If that’s not possible, make sure it’s secure by using your bench peg for support, and loosen the grip of your saw – a tight grip will only put more pressure on as you’re cutting, increasing the risk of snapping the blade. Work on a steady sawing motion that comes from your elbow and not your wrist – this will help you keep a steady hand and a straight cut.
How to insert blades into a jeweller’s saw frame
Ensuring you’ve inserted your blade into your jeweller’s saw frame properly will give you a much better starting point when it comes to cutting sheet metal.
Firstly, make sure that the teeth of the saw are pointing towards your handle, because each cut you make will be on the downward stroke of the saw. The upward stroke is merely a way of repositioning the saw for the next cutting stroke.
Now loosen the screws on the saw frame and insert the blade into the end of the frame closest to the handle. At this point you can place the top end of the saw frame against a stable surface so that it bows slightly, helping you to feed the other end of the saw blade into the frame, before tightening the screws.
How do you know if the saw blade is secure and ready to use? Once in place, carefully pluck the blade like a harp string. If you hear a high ‘ping’ your blade is tightly secured and your jewellery metal cutting saw is ready to use.
Our top metal cutting tips
Before you get started trying out these new methods with your sheet metal cutter, read through our top tips below. They’ll help you refine your technique and, with a little practice, help you perfect your cutting sheet metal technique.
- If the line you’re sawing is not straight, try to move the piece of sheet metal you’re working on and not the saw. By keeping the saw and your sawing motion in the same position, you will retain much more control.
- When sawing intricate lines, even the slightest turn of the blade can cause it to snap. Reduce the risk of snapping saw blades by using a blade lubricant.
- Apply only a small amount of pressure. A light hand will stop your blade from binding up in your sheet metal and going off course.
- Start out with 2/0 jeweller’s saw blades. These blades are suitable for use with sheet metal ranging from a 0.6mm to a 0.8mm thickness.
- Pick up some finer blades when you want to tackle more intricate curved work. Use coarser blades for the best outcome when cutting straight lines.
- When starting out you may want to invest in an adjustable jeweller’s saw frame. This means that even when a saw blade has snapped, it can be re-inserted and re-used with the adjustable saw frame, helping you cut costs on new saw blades.
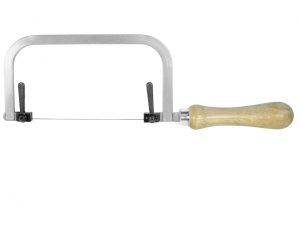
- A jeweller’s saw frame is usually a ‘U’ shape and the height of the ‘U’ helps you make longer cuts further into the sheet metal you’re working with. A 3-inch frame will be an ideal starting point for beginners.
- When you set up your bench ready for cutting sheet metal, make sure your bench pin is set almost at eye level – to help you to cut as straight as possible. It can also help to make sure your elbows are in a fixed comfortable position, making it easier for you to keep a steady hand while working.
- Starting the sawing motion can often be the most difficult part. Start with your saw at a slight angle to the sheet metal then adjust to a straight line. This will help you to start the sawing motion without catching the blade in the first instance.
Mastering the use of a metal cutting saw means you’ll soon be able to create intricate curves and shapes in your sheet metal. Want further guidance on which tools to invest in as a beginner? Use our Beginners’ Guide to Jewellery Making Tools to help you build out your workbench and hone your technical skills.
source https://www.cooksongold.com/blog/learn/tips-and-tools-for-sawing-sheet-metal-2/


Comments
Post a Comment