How To Make A Mini Wreath
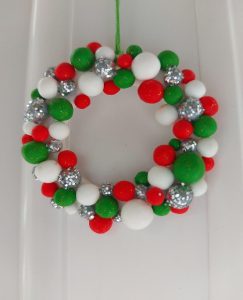
Get crafty this winter with our guide on how to make a mini wreath for Christmas. These versatile decorations can be hung anywhere from door handles to windows and can be made to fit in with just about any colour scheme you please. They come with a warning though as they are very addictive to make and you will quickly find that one simply isn’t enough!
What you’ll need to make a mini Christmas wreath:
Fimo Professional Colour Pack of 12 – 866 370
Fimo Kids Silver Glitter – 866 220
Fimo Kids Red Glitter – 866 205
Fimo Modelling Tools – 867 210
Baking parchment or greaseproof paper
A straw
Fimo Water Based Varnish – 867 217
How to make a mini wreath: step-by-step
- Select four complimentary Fimo colours. It mixes beautifully just by kneading different colours together, so you needn’t be limited by what you have. Glitter and plain colours can be combined to great effect, so just experiment and see what happens.
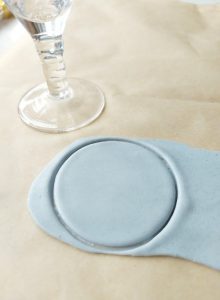
- Roll out your base colour on a piece of greaseproof paper, to approximately 3-4mm thick, large enough to cut out a circle around 55mm diameter. Mark out the external edge of your circle (using the Fimo craft knife) by tracing around a template to create a good edge. I used a glass.
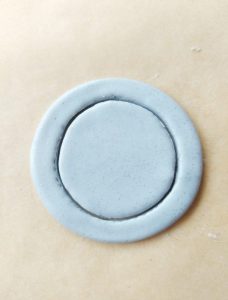
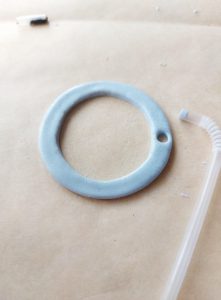
- Using the craft knife again, mark out a slightly smaller circle within the first, to form a band about 6-8mm wide.
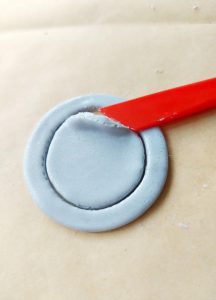
- Gently lift out the excess clay in the middle and neaten up the edges using your craft tools. The beauty of using greaseproof paper as your work surface means any excess clay is easily scraped away to be reused later.
- Use the end of a straw to cut out a hole that is positioned centrally within the band.
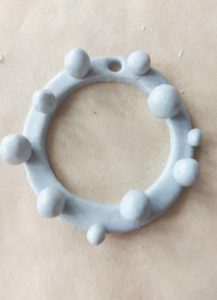
- Now you can start to make the baubles. Start with your base colour or the lightest colour in your palette and roll a series of balls of different sizes to be placed at regular intervals around the band. TOP TIP: I always start with the lightest colour as Fimo colours tend to transfer onto surfaces and hands. Wash hands and wipe down surfaces every time you change colour to avoid any contamination of your clay.
- Repeat the process with your second colour choice
- Again, with the remaining two colours until your wreath is covered and the gaps are filled. Try to vary the depth of the baubles as well as the size to create a random and 3-dimensional effect.
- Once you are happy with the design, simply pick the piece of greaseproof paper up with the model in situ and transfer the whole lot straight onto a baking tray. Bake in a low oven following the manufacturers guidelines (around 25mins on the lowest oven setting).
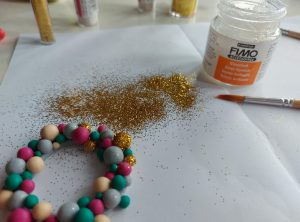
- Once cool, it’s time to add the glitter. Obviously, you can add as much or as little as you please, but I chose to add it to one colour per wreath to keep things varied. Simply paint the Fimo Gloss Varnish onto the baubles where you want the glitter, and then drizzle it over the top so it sticks. You might need to do this a few times to get good coverage, turning your piece in different directions as you pour it. Brush off any excess glitter with a dry, clean paintbrush and gently pat down with your finger to make sure it’s stuck securely.
- Finally add a complimentary coloured ribbon to complete your Christmas wreath, knotting securely to create a closed loop at the base and at the top.
Now you know how to make a mini wreath to add to your box of decorations, it’s time to give it a try yourself. Inexpensive to make and very rewarding, these Fimo wreaths are a great way to spend a rainy Sunday afternoon. Make sure you have all the Fimo products you need from Cooksongold before you get started.
Written by Joanna Varney
Joanna has worked in and around the jewellery industry for well over 20 years. She has designed and created her own pieces as a designer maker, as well as working in jewellery retail on a much larger scale, producing designs and NPD for some of the UK’s largest high street retailers
The post How To Make A Mini Wreath appeared first on The Bench.
source https://www.cooksongold.com/blog/how-to-guides/mini-christmas-bauble-wreaths








Comments
Post a Comment