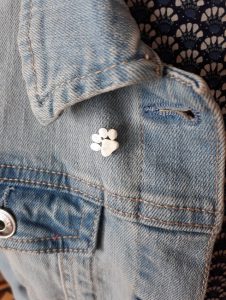
Paw Print Silver Pin Project
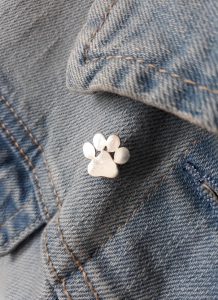
National Dog Day is celebrated on August 26th this year and what better way to honour your favourite pooch than with your very own little pawprint to take with you wherever you go.
You will need:
Sterling Silver Stud Back No Pin Pack of 6
Sterling Silver Grooved Headed Tie Tack Pin 9.5mm X 1.1mm Pack of 6
Piercing Saw
Scriber
Needle Files
Buff sticks
Soldering Torch and flux
Safety Pickle
Reverse action tweezers
Fine tweezers
Plastic tweezers
Scratch brush used with hand drill or flexi shaft system
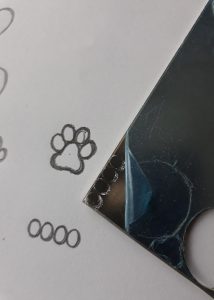
- Draw out your design on paper and then transfer to metal when happy using a scriber. (My design measures approximately 13mm across at its widest point).
- Cut out each individual component using a piercing saw. Don’t worry if they are a bit rough, they can be refined afterwards.
- Round off the edges using needle files, followed by buff sticks for a neat finish. You need to do this now as you won’t be able to access all of the edges once the piece is soldered together.
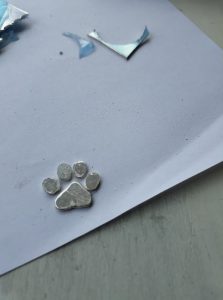
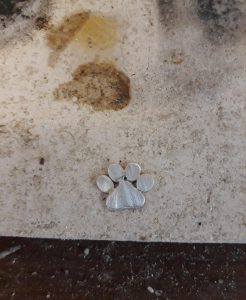
- Once happy with the edges, arrange the pieces on a heat resistant soldering block ready for assembly. Lightly file or sand your strip of hard solder (to remove any grease or impurities) and snip off a series of tiny pieces.
- Flux your silver pieces at all the points where they touch another component (7 positions). By doing all of these joins at the same time using hard solder, you should end up with a nice, strong piece.
- Position your solder pallions onto all of the joins.
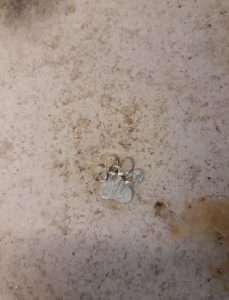
- Gently start to heat the pieces, moving the flame constantly to create an even temperature. As the metal starts to glow the solder should run to flood the joints. Once all the solder has run, remove the flame quickly and pickle to clean.
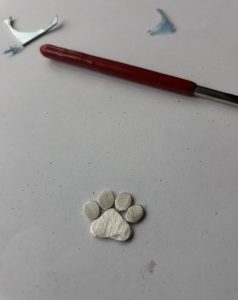
- Remove from the pickle using plastic tweezers and rinse. Use an old toothbrush to remove any residue if required.
- File and sand off any excess solder. You will see that one of my joins didn’t run. This really isn’t a problem. As long as the piece is strong and holds together well, it doesn’t matter too much and is actually in keeping with the integrity of the design.
- Now it is time to solder on the pin. I have chosen to use Easy solder so there is no risk to the other solder joins, but you could use Medium if that’s what you have. Flux the middle of the pawprint at the point of contact as well as the end of the pin itself.
- Clean and cut a piece of Easy solder and place in position.
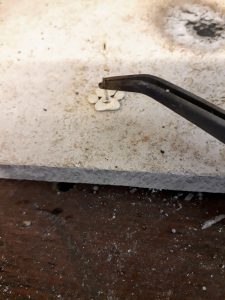
- Hold the pin in a pair of reverse action tweezers and the torch in your opposite hand. This can be tricky, so practice the positioning first with an unlit torch if you are not confident.
- Heat gently focusing on the bigger pieces first, keeping the flame moving at all times. Remember, smaller pieces will heat up more quickly so don’t linger on the pin for too long. As the pieces start to glow evenly, the solder should run. As soon as this happens, remove the flame quickly.
- Pickle to clean.
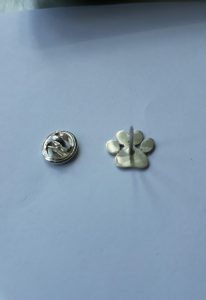
- Use a series of buff sticks (moving through the grades), to remove any marks and bring the piece to a good surface finish.
- Using a scratch brush with either a hobby drill or flexi shaft system to bring the finished pin to a subtle shine.
This basic design can be adapted and finished in many other ways, so have fun with it and make it your own fitting and unique tribute to your special fluffy friend.
Written by Joanna Varney
Joanna has worked in and around the jewellery industry for well over 20 years. She has designed and created her own pieces as a designer maker, as well as working in jewellery retail on a much larger scale, producing designs and NPD for some of the UK’s largest high street retailers
The post Paw Print Silver Pin Project appeared first on The Bench.
source https://www.cooksongold.com/blog/jewellery-making-projects/paw-print-silver-pin-project
Comments
Post a Comment