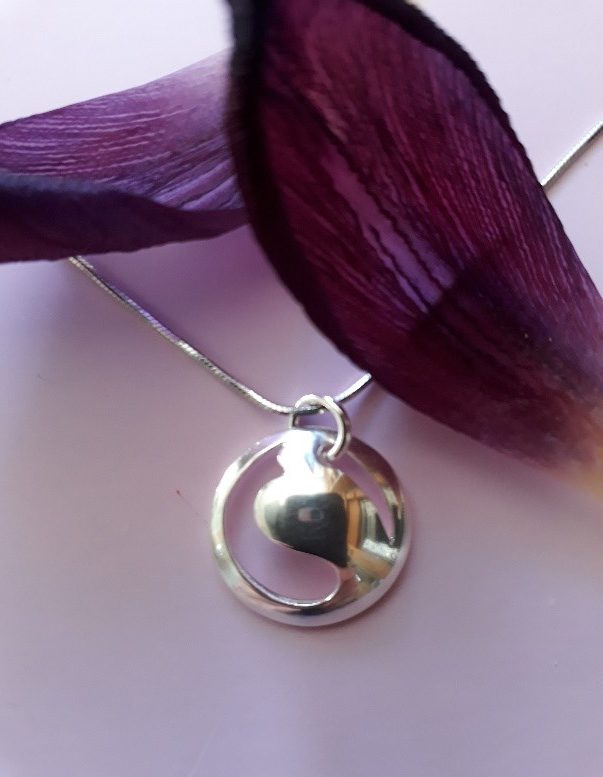
A Simple Pendant for Valentine’s Day
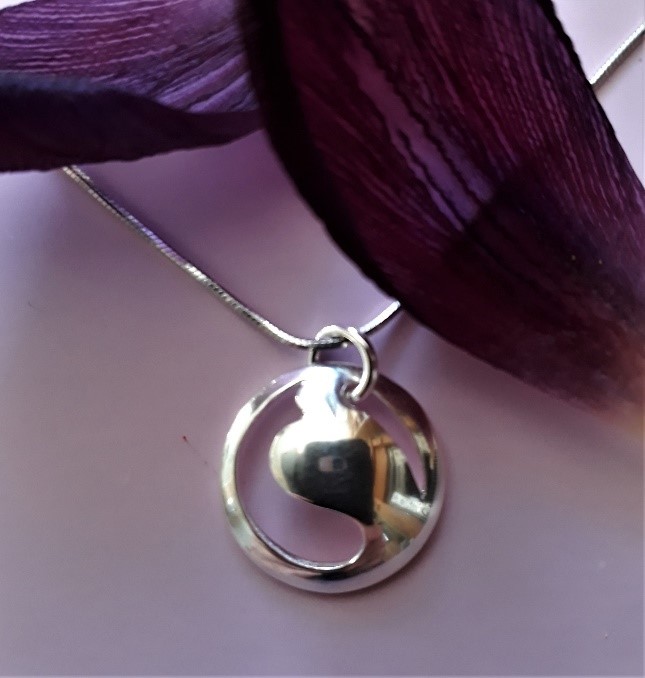
If you would like to make something romantic that doesn’t scream Valentine’s Day, why not try making my stylised heart pendant. Encapsulated within a circle, with a nod to the age-old yin yang symbol, this unisex design is easy to produce and involves no soldering making it ideal for a beginner.
You will need:
Handheld drill and small drill bit approx. 1mm
Small polishing mops or tumbler if you have one
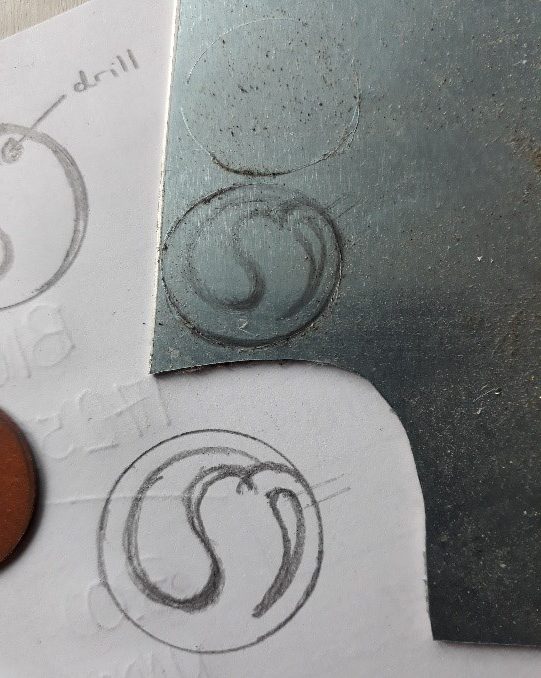
- Start by marking out your metal. Draw a circle 20mm in diameter and lightly sketch out your design onto the plastic film protecting the surface using a pen or pencil. When you are happy with the design, go over it again with a scriber.
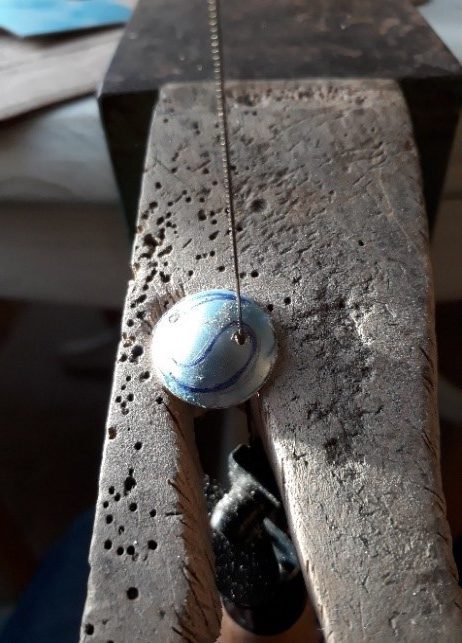
- Pick two points, one for each internal space, to drill an access hole for your saw (see picture below).
- Mark each hole with a centre punch and hammer and drill through. It’s far easier to do this when you have a bigger piece of metal to hang on to!
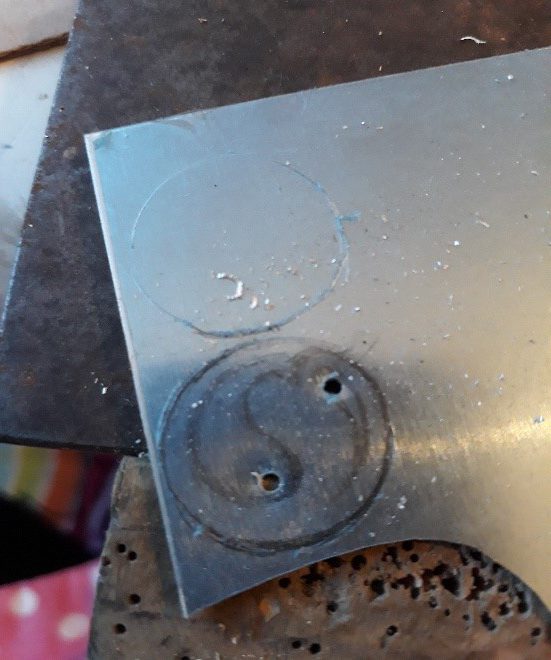
- Cut out the circle using a piercing saw, making sure to work outside of the marked line.
- Once cut out, lightly file the edges of the circle to even out if required.
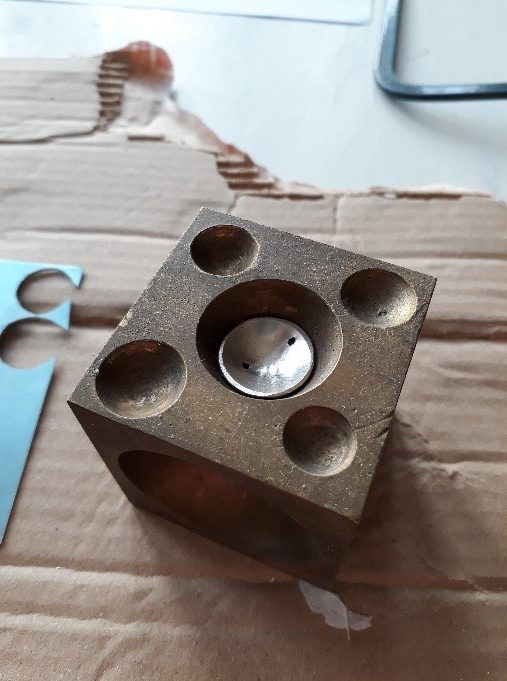
- Dome the flat disc using the doming block and punches, ensuring the indent is large enough to completely accommodate the full diameter of the circle.

- Once you are happy with the domed profile of your pendant, cut out the negative, internal shapes. (This is probably the trickiest part of the project, so a slow and steady approach is advisable). Undo one end of your sawblade from the frame, thread it through one of the holes in the pendant and re-secure it so it is taught and ready to use.
- Saw out the first shape ensuring you cut well inside the marked line. This will leave you enough material to adjust the shape and refine any uneven cuts with a file afterwards.
- Once the first shape is completely cut out, repeat the process with the second internal shape.
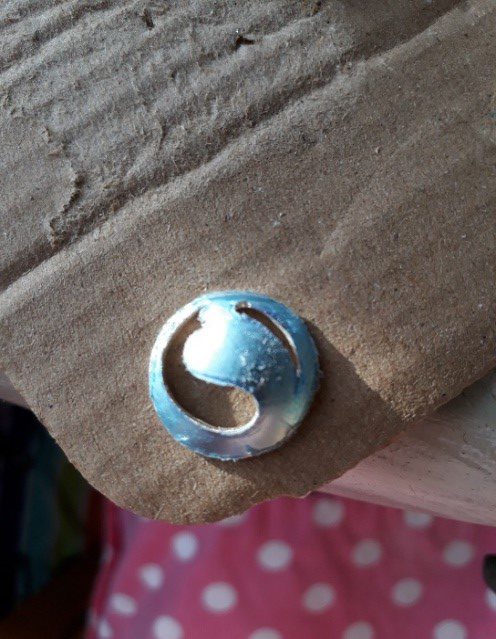
- With the cutting complete, it is time to start the finishing process. Start off using needle files and gently begin to perfect the edges both internal and external, concentrating on creating lovely smooth curves. Take your time, it will be worth it!
- Once you are happy with the overall shape, move onto the emery paper stage. Use a combination of buff sticks and sheets, working up the grades from coarse to fine, to steadily refine and remove any imperfections. (I also tried my jump ring for size at this point to make sure everything fitted nicely and looked good).
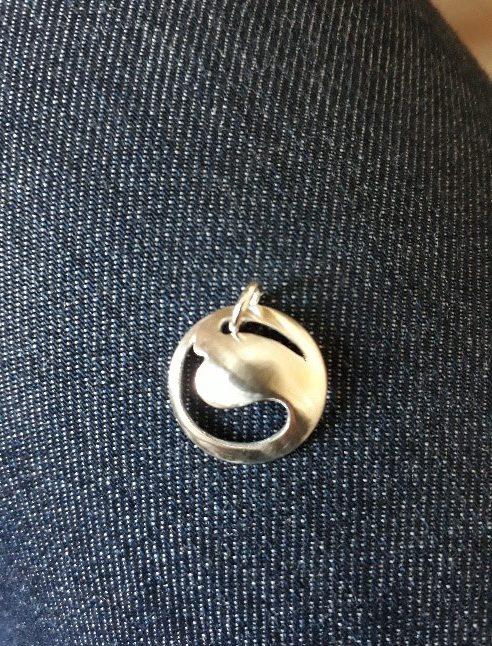
- Polish to finish using either a tumble polisher or polishing mops. Alternatively, you could leave it with a satin or scratch brushed finish if you prefer.
- Finally, add the jump ring using the pliers, making sure it is closed tightly once on. Because it sits at the top of the tapered cut out, the jump ring should stay nicely in position, keeping the pendant hanging correctly. If you find it’s moving around too much use a slightly larger jump ring to stop this.
This Valentine’s Jewellery Making Project can be adapted and changed in many different ways to make it your own. Why not try incorporating different shapes into circles and see where it takes you…
See other projects and how-to guides via this link: cooksongold.com/projects
Written by Joanna Varney
Joanna has worked in and around the jewellery industry for well over 20 years. She has designed and created her own pieces as a designer maker, as well as working in jewellery retail on a much larger scale, producing designs and NPD for some of the UK’s largest high street retailers
The post A Simple Pendant for Valentine’s Day appeared first on The Bench.
source https://www.cooksongold.com/blog/how-to-guides/a-simple-pendant-for-valentines-day


Comments
Post a Comment