How To Bake Polymer Clay At Home
Are you just getting started with your new polymer clay hobby? Discover our beginners guide on how to bake polymer clay, the right way. From perfecting baking times and temperatures, to top tips and FAQs. Read more below.
How long to bake polymer clay for
The baking times and temperatures for baking polymer clay are crucial. If the temperature is too low, the clay will crumble. But if it’s too hot, the outside will fuse and burn before the centre of the clay is cooked through. While baking, the clay should cure evenly throughout and turn into a hard plastic.
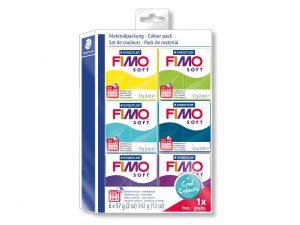
Wondering how to bake Fimo clay in a conventional oven? And what temperature do you bake fimo clay at? The best way to find out is to pay attention to the baking instructions on the packaging of your polymer clay. But here’s a quick rundown of the standard timings and temperatures for baking Fimo clay:
Wondering how to bake Fimo clay in a conventional oven? And what temperature do you bake fimo clay at? The best way to find out is to pay attention to the baking instructions on the packaging of your polymer clay. But here’s a quick rundown of the standard timings and temperatures for baking Fimo clay:
| Clay Type | Temperature | Baking Time |
| Fimo Soft | 110 degrees Celsius | 30 minutes |
| Fimo Effect | 110 degrees Celsius | |
| Fimo Professional | 110 degrees Celsius | |
| Fimo Leather Effect | 130 degrees Celsius |
Timings will vary depending on the width and size of the piece of clay you are baking – be that a jewellery bead, charm or decoration. For more accurate timings, measure the thickness of your polymer clay. So, for example, with a jewellery bead, you would measure the height (top to bottom) as this is the thickest part of the bead. With a charm, measure the depth (front to back). And with a sculpture, take the measurement of the widest point of the piece on the longitudinal axis. The general rule of thumb is that 6mm is the standard when it comes to baking times. So…
| Measurement | Baking Time |
| 6mm | 30 minutes |
| 9mm | 45 minutes |
| 12mm | 60 minutes |
And so forth… Generally, baking for a slightly longer time than required is better than not baking for long enough. If you reach the end of the suggested baking time and you think your piece is still slightly soft, avoid the risk of burning it and remove it from the oven to allow it to cool. Polymer is naturally quite soft when first brought out anyway, so you’ll probably find that it will harden a little more and may need no extra baking time after all. If not, put it back in for a few minutes, but keep an eye on it. In fact, you should never leave your oven unattended when baking polymer clay.
FAQs for baking polymer clay
Here we have answered some of your most frequently asked questions when it comes to baking Fimo clay.
Does polymer clay need to be baked?
Yes, because it won’t cure properly otherwise. Although there are polymer clays available that cure by air-drying, such as the Fimo Air Light Clay. This is a simple, easy solution to creating clay jewellery and other designs for beginners as it requires no heat and cures at room temperature. Once dry, you can cut, sand, glue and paint your air light clay as you wish.
How many times can you bake polymer clay?
 You can bake polymer clay multiple times. It can be handy to bake your clay in stages to avoid causing any damage to what you’ve done previously. Although it is important to note that it will be difficult to attach raw clay to a piece that has already been cured. It isn’t harmful to bake more than once, although some areas may darken more than others – especially those that are thinner than others, and they may become more brittle.
Can you over bake polymer clay?
Yes. But don’t worry if you slightly over-cook your clay. You can fix it by covering it up and adding another layer to re-bake or paint over. You can also try to remove any burnt edges or browning by sanding them off – although this method doesn’t always work if the piece is burned the whole way through, so it’s important to get it right the first time around.
We would recommend baking a tester piece first, to make sure that you can get it right. Just roll a piece of your clay mixture to the same thickness as your actual piece to get a more accurate representation. Once cool, you will be able to break or cut this sample in half to see if there are any signs of brittleness, or to see if the centre is crumbling.
Can you bake polymer clay in a microwave?
 It is not advised to use a microwave when baking polymer clay as they don’t heat evenly – so some parts of your polymer clay piece will begin to cure properly, while others will remain soft.
Top tips for baking Fimo clay:
- Avoid baking on a metal or glass surface – use a wooden board or a ceramic plate or tile.
- When baking beads, hang or prop them up so they don’t touch any surface to avoid gaining a flat side on your bead.
- Avoid breathing in the fumes when baking polymer clay. If you’re not working in a well-ventilated area then consider wearing a dust mask.
- If you have used any kitchen equipment when baking Fimo, do not use it for food preparation in the future. Using the right polymer clay tools will help you to avoid these contamination issues.
- When baking in a conventional oven, after reaching the correct level of heat, the temperature may spike or alter as you open the door to put your piece in to bake. To help avoid this, place a couple of ceramic tiles inside the oven – these will act as a heat sink to help stabilise the oven temperature.
Once you’re finished baking polymer clay, you can decorate your piece as you wish – using paints or other finishes to create beautifully unique designs.
Now you know how to bake polymer clay, you can get started on bringing your designs to life. Don’t know where to start? Check out our full range of Fimo polymer clay tools for everything you’ll need to kickstart your new polymer clay hobby.
The post How To Bake Polymer Clay At Home appeared first on The Bench.
source https://www.cooksongold.com/blog/how-to-guides/how-to-bake-polymer-clay-at-home


Comments
Post a Comment